
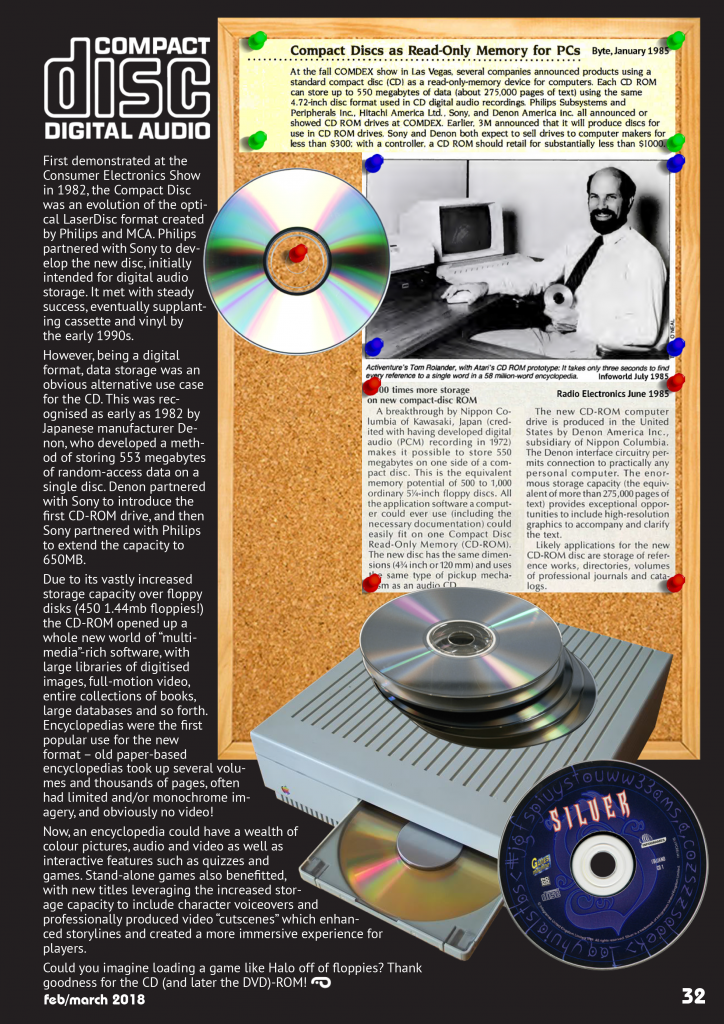
First demonstrated at the Consumer Electronics Show in 1982, the Compact Disc was an evolution of the optical LaserDisc format created by Philips and MCA. Philips partnered with Sony to develop the new disc, initially intended for digital audio storage. It met with steady success, eventually supplanting cassette and vinyl by the early 1990s.
However, being a digital format, data storage was an obvious alternative use case for the CD. This was recognised as early as 1982 by Japanese manufacturer Denon, who developed a method of storing 553 megabytes of random-access data on a single disc. Denon partnered with Sony to introduce the first CD-ROM drive, and then Sony partnered with Philips to extend the capacity to 650MB.
Due to its vastly increased storage capacity over floppy disks (450 1.44mb floppies!) the CD-ROM opened up a whole new world of “multimedia”-rich software, with large libraries of digitised images, full-motion video, entire collections of books, large databases and so forth. Encyclopaedias were the first popular use for the new format – old paper-based encyclopaedias took up several volumes and thousands of pages, often had limited and/or monochrome imagery, and obviously no video!
Now, an encyclopaedia could have a wealth of colour pictures, audio and video as well as interactive features such as quizzes and games. Stand-alone games also benefitted, with new titles leveraging the increased storage capacity to include character voiceovers and professionally produced video “cutscenes” which enhanced storylines and created a more immersive experience for players.
Could you imagine loading a game like Halo off of floppies? Thank goodness for the CD (and later the DVD)-ROM!
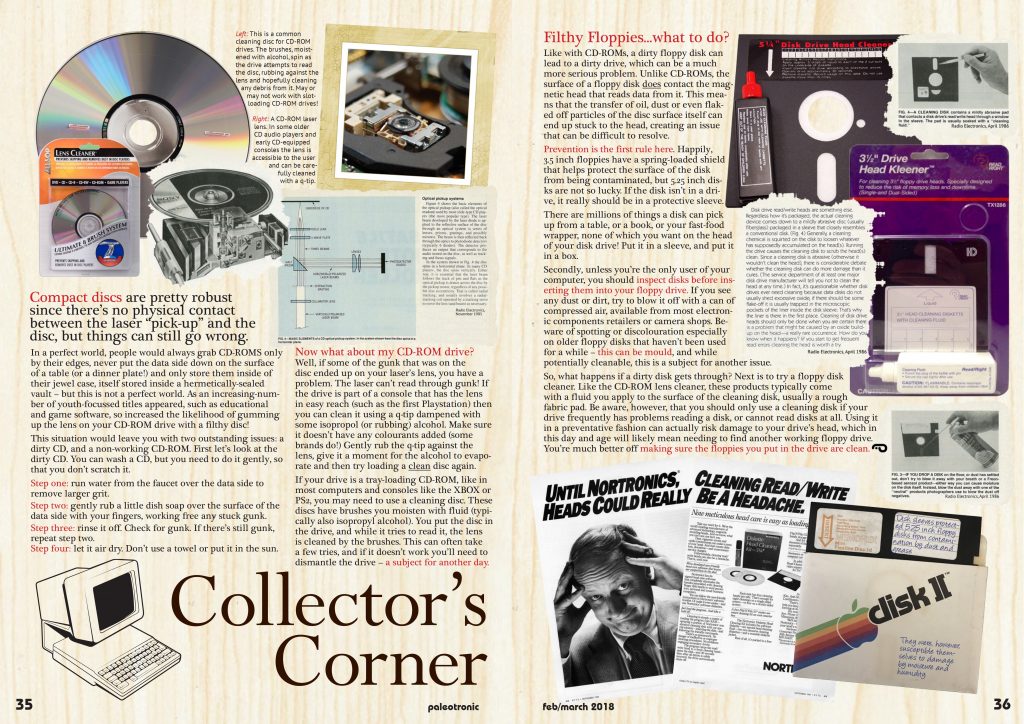
In a perfect world, people would always grab CD-ROMS only by their edges, never put the data side down on the surface of a table (or a dinner plate!) and only store them inside of their jewel case, itself stored inside a hermetically-sealed vault – but this is not a perfect world. As an increasing-number of youth-focussed titles appeared, such as educational and game software, so increased the likelihood of gumming up the lens on your CD-ROM drive with a filthy disc!
This situation would leave you with two outstanding issues: a dirty CD, and a non-working CD-ROM. First let’s look at the dirty CD. You can wash a CD, but you need to do it gently, so that you don’t scratch it.
Step one: run water from the faucet over the data side to remove larger grit.
Step two: gently rub a little dish soap over the surface of the data side with your fingers, working free any stuck gunk.
Step three: rinse it off. Check for gunk. If there’s still gunk, repeat step two.
Step four: let it air dry. Don’t use a towel or put it in the sun.
Now what about my CD-ROM drive?
Well, if some of the gunk that was on the disc ended up on your laser’s lens, you have a problem. The laser can’t read through gunk! If the drive is part of a console that has the lens in easy reach (such as the first Playstation) then you can clean it using a q-tip dampened with some isopropol (or rubbing) alcohol. Make sure it doesn’t have any colourants added (some brands do!) Gently rub the q-tip against the lens, give it a moment for the alcohol to evaporate and then try loading a clean disc again.
If your drive is a tray-loading CD-ROM, like in most computers and consoles like the XBOX or PS2, you may need to use a cleaning disc. These discs have brushes you moisten with fluid (typically also isopropyl alcohol). You put the disc in the drive, and while it tries to read it, the lens is cleaned by the brushes. This can often take a few tries, and if it doesn’t work you’ll need to dismantle the drive – a subject for another day.
Filthy Floppies…what to do?
Like with CD-ROMs, a dirty floppy disk can lead to a dirty drive, which can be a much more serious problem. Unlike CD-ROMs, the surface of a floppy disk does contact the magnetic head that reads data from it. This means that the transfer of oil, dust or even flaked off particles of the disc surface itself can end up stuck to the head, creating an issue that can be difficult to resolve.
Prevention is the first rule here. Happily, 3.5 inch floppies have a spring-loaded shield that helps protect the surface of the disk from being contaminated, but 5.25 inch disks are not so lucky. If the disk isn’t in a drive, it really should be in a protective sleeve.
There are millions of things a disk can pick up from a table, or a book, or your fast-food wrapper, none of which you want on the head of your disk drive! Put it in a sleeve, and put it in a box.
Secondly, unless you’re the only user of your computer, you should inspect disks before inserting them into your floppy drive. If you see any dust or dirt, try to blow it off with a can of compressed air, available from most electronic components retailers or camera shops. Beware of spotting or discolouration especially on older floppy disks that haven’t been used for a while – this can be mould, and while potentially cleanable, this is a subject for another article.
So, what happens if a dirty disk gets through? Next is to try a floppy disk cleaner. Like the CD-ROM lens cleaner, these products typically come with a fluid you apply to the surface of the cleaning disk, usually a rough fabric pad. Be aware, however, that you should only use a cleaning disk if your drive frequently has problems reading a disk, or cannot read disks at all. Using it in a preventative fashion can actually risk damage to your drive’s head, which in this day and age will likely mean needing to find another working floppy drive.
You’re much better off making sure the floppies you put in the drive are clean.
Be the first to comment